Oh my goodness, I have been so busy lately that Thanksgiving is sneaking up on me and I have barely noticed! I really had meant to blog about several projects that I made this year, and I never did! So instead I'll just post pictures of what I did! Here's a look at some of the Thanksgiving things around my house...
This was a fun little project. I made an this 8x10 print and put it in a frame on our kitchen counter. We have a dry erase marker next to it that we use to write something we are thankful for every day, then I just wipe it off for the next day. Notice that my son is thankful for movies and donuts. He's 11, can you tell? This is fun for me to see what crazy things my kids will write.
I also made a new runner for Thanksgiving this year. I LOVE these colors!
I wanted some green plates to match the green in my runner, and I found this set at Walmart on CLEARANCE. Chargers and napkin rings also on clearance. Sweet.
Now I can't wait for the FOOD! Happy Thanksgiving!
Showing posts with label Thanksgiving. Show all posts
Saturday, November 19, 2011
Thursday, November 3, 2011
Glass Thanksgiving Decor Tutorial
So I've been looking for some cheap and easy decor ideas, and I found one on Pinterest that looked super easy. This is the finished project:
Total cost--under $10.00
Total time--about and hour. Not too bad. So here's what I did:
I bought 6 of these glasses from the dollar store. They have many different shapes and sizes, these were just about what I was looking for.
Then, I used a black Sharpie to write "grazie" on them. Italian for Thank You. Don't ask me why, but I like to do things in different languages. It's just something a little different from the norm, and it makes me feel smart. :)
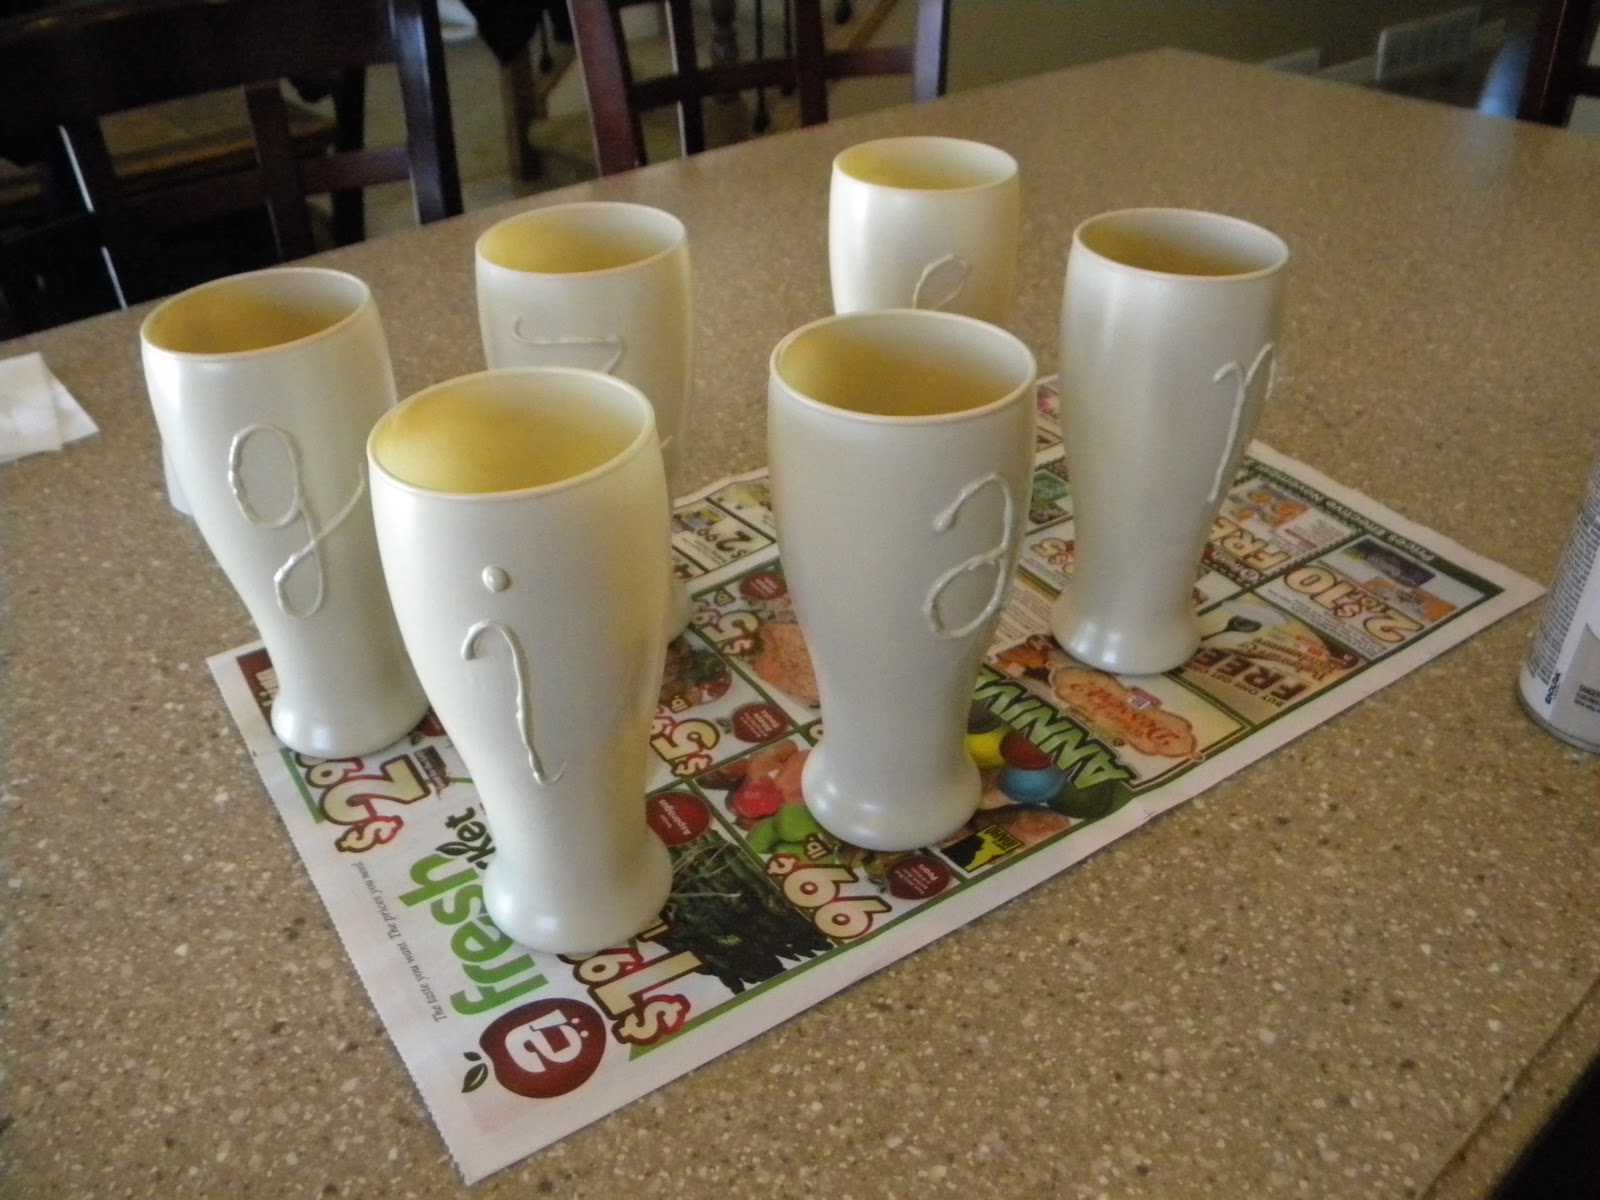
Next, I took a glue gun and traced the letters. Make sure you go slow and steady to try to get an even look. I wish I had a steadier hand, mine turned out a little more bumpy than I would have liked. The good thing about glue on glass, is that if you do mess up, it peels off really easily and you can try again! Also, try to get rid of all those glue strings when the glue has dried.
Then, I took them outside to get spray painted. I chose an almond color so it would stand out on my black shelf, but you can do whatever color you'd like!
Give them a light coat first, then give them a few minutes to dry. Don't spray too much at once or your paint will run! I did probably 5 or 6 coats before I felt like they were well covered. And yes, that's snow. Brrrr. Then I brought them inside to dry all the way.
When they were dry I just rounded up some fall picks and flowers that I already had laying around and arranged them all on my shelf. Like so:
It's nothing crazy amazing, but it was cheap and easy. And it filled the shelf. Have fun!
Total cost--under $10.00
Total time--about and hour. Not too bad. So here's what I did:
I bought 6 of these glasses from the dollar store. They have many different shapes and sizes, these were just about what I was looking for.
Then, I used a black Sharpie to write "grazie" on them. Italian for Thank You. Don't ask me why, but I like to do things in different languages. It's just something a little different from the norm, and it makes me feel smart. :)
Next, I took a glue gun and traced the letters. Make sure you go slow and steady to try to get an even look. I wish I had a steadier hand, mine turned out a little more bumpy than I would have liked. The good thing about glue on glass, is that if you do mess up, it peels off really easily and you can try again! Also, try to get rid of all those glue strings when the glue has dried.
Then, I took them outside to get spray painted. I chose an almond color so it would stand out on my black shelf, but you can do whatever color you'd like!
Give them a light coat first, then give them a few minutes to dry. Don't spray too much at once or your paint will run! I did probably 5 or 6 coats before I felt like they were well covered. And yes, that's snow. Brrrr. Then I brought them inside to dry all the way.
When they were dry I just rounded up some fall picks and flowers that I already had laying around and arranged them all on my shelf. Like so:
It's nothing crazy amazing, but it was cheap and easy. And it filled the shelf. Have fun!
Linking up here:
Tuesday, November 1, 2011
Free Thanksgiving Print
Wow. It's snowing here. Like, really snowing. Grrrr. I was not prepared for that this morning! I am happy that it's November though, and the start of all the fantastic Holiday celebrating! Woo-hoo!! I managed to get all my Halloween stuff put away, and busted out the Thanksgiving decor! I made you all a little printable too. It prints 8x10 so it'll look great in a frame. I would show you a picture of it in a frame, but I of course ran out of ink, so I'll have to work on that. Here ya go, just right click and save.
This also happens to match my new Fall Printable Party Pack I just finished this morning, take a look:
This is available in my Etsy shop HERE!
This also happens to match my new Fall Printable Party Pack I just finished this morning, take a look:
This is available in my Etsy shop HERE!
Linking up here:
One Tough Mother: Not So Tough Tuesday
Everything Under The Moon: Bedazzle me Monday
Homemaker on a Dime: Creative Blog Hop
I Heart Naptime: Sundae Scoop
Ginger Snap Crafts: Wow Me Wednesday
Clean and Scentsible; The Creative Spark
Dittle Dattle: Amaze Me Monday
Southern Lovely: Show and Share
the 36th Avenue
Just a Girl :Show and Share
Family Ever After: Once Upon a Weekend
Be Different Act Normal
Everything Under The Moon: Bedazzle me Monday
Homemaker on a Dime: Creative Blog Hop
I Heart Naptime: Sundae Scoop
Ginger Snap Crafts: Wow Me Wednesday
Clean and Scentsible; The Creative Spark
Dittle Dattle: Amaze Me Monday
Southern Lovely: Show and Share
the 36th Avenue
Just a Girl :Show and Share
Family Ever After: Once Upon a Weekend
Be Different Act Normal
Subscribe to:
Posts (Atom)