I am so excited to show you what I have been up to the last couple of days! First let me show you the finished products, and then I'll dive into the how-to! Here is the first:
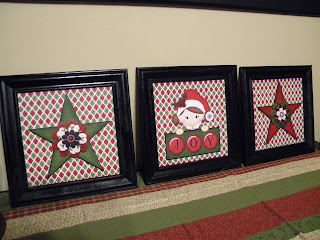
I absolutely LOVE how these turned out! My upstairs Christmas decorations are all Vintage pinks and creams and gold. I was thrilled when Katie came out with this kit, because finally I had something to match. And since it's snowflakes, I can keep it up through January! The second set I made to go with my downstairs Christmas decorations, which are traditional red and green, with cream and black. Here's project #2:
These projects were actually quite simple to make, and pretty cheap too!
For each of these projects I needed some 8x8 frames, which I could not find ANYWHERE! So, I made my own. If you are lucky enough to find cheap 8x8 frames--skip down to the cutting out part and don't worry about this first part! For those of us who couldn't find any, you will need a few materials to make yours. I went to Home Depot, grabbed one of their 2' x 4' pieces of hardboard ($3.42), and asked one of their super helpful and handsome employees to cut it up into 8 inch squares--for free. So now I have 12 8x8 inch hardboard squares. Since you only need 3 per set, I suggest grabbing some friends and splitting the cost.
Now, while at Home Depot, I also grabbed 2 pieces of small molding. They were 8 feet long. You want something sort of small, mine was just over an inch wide. You also want something flat on the backside, not beveled, like this:
The molding ranges from super ornate to pretty simple, and about $2.00 a piece to about $10.00 a piece. It's totally up to you which kind you choose. I chose something in the middle, a simple pattern, and about 5 bucks. Now, you are going to want your molding to hang over the edge of your hardboard, so cut your molding sections a little bigger then 8 inches. I cut mine in 9 inch sections, so that the outside of my frame would hang over about 1/2 an inch. If your molding is super narrow, cut at about 8.5 inches.
Then, I cut each side at 45 degree angles, with the wider part of the molding on the outside (the 9 inch side).
So now if you take 4 of your sections and put them on your 8 inch hardboard, they will hang over just a bit:
This will give you all the wiggle room you need to make your frame square and cover your paper. You'll need to spray paint your sections now. For the first set I chose Ivory. You can choose any colors depending on which set of prints you are using.
These will take several coats of paint, so while that's drying, you can cut out your pictures.
You can just either buy scrapbook paper and cut out the pieces you'll need, or buy one of several sets of these prints from my Etsy store HERE or my Just So Scrappy store HERE. If you buy them from me, you will simply print them out on white cardstock like this:
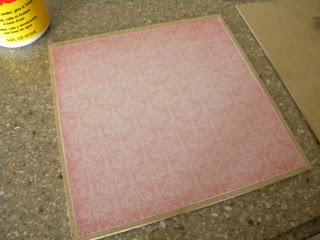
Cut out the 3, 8 inch square papers:
Now grab some Mod Podge and a brush. Slather the Mod Podge all over the paper or the hardboard, which ever is easier, line up the paper on the middle of the board, and smooth it out.
Now, flip it over and put a heavy book on it while it dries.
Now it's time to cut out your snowflakes. I know, it's a pain, but well worth it ladies!
I used an Xacto knife to cut out the smaller parts. Please use a cutting board for that, don't mess up that counter top! Since cutting these out takes some time, take a break between each one and go out and respray your molding sections. Then come back inside and cut out more snowflakes while the paint dries. After you've cut out all your snowflakes and whichever 3 flowers you choose to use, they will look like this:
Once your painted molding is dry, and your paper on the hardboard is dry, you are ready to glue on your frame. Line the sections up on your hardboard until it fits together well. Remember it is supposed to hang over the edge a bit:
I used a glue gun to glue those pieces on, but again, a glue gun is not very forgiving if you make a mistake. Use something repositionable, like good ol' Elmers or some other craft glue. Take the top section off, run a line of glue on your board, and place the top piece back on, using the pattern in the paper to help keep it straight.
Try to get it as even on both sides as you can. Also, don't put the glue all the way to the ends because if it seeps out the sides, your next section of molding won't sit flat. Now keep holding your frame in place and glue one section at a time. Don't worry if they don't line up perfectly. Mine didn't and you can't even tell. It isn't meant to be perfect.
Continue until you've glued all 4 sides on. You may need to put a book on it while it dries. Follow these same steps for the other 2 boards. By the third one you'll be a pro! This is what they'll look like after all 3 boards are framed:
Now you need to decide which snowflake and which flower you'd like where:
On the snowflake first, I used those 3-D foam sticky dots you can find at any craft store or even Walmart. This way they stuck out a little and added some dimension to the picture.
Then I did the same thing with the flower on top:
Do this to all 3 of your pictures and voila! You are done!
For my second set of pictures, I followed the same steps:
I cut my molding and painted them black instead:
I printed out the pictures, and cut them out:
Then I Mod Podged the paper to the boards:
Glued the black molding on:
Put foam dots on my stars and flowers:
Put them all together:
That's it! I think my second set took less than half the time of the first set! Now that I know what I'm doing, I may get ambitious enough to make some gift sets! I will have several sets of prints up in my store in the next few days so you'll have some different things to choose from. Enjoy!!!
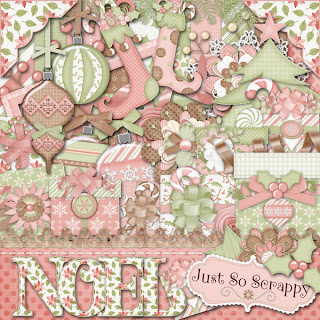
The kits that I used to make these prints are:
They are both available at Just So Scrappy 2 HERE.


Those look so lovely! :) I love the 3D appearance. Thanks for the tutorial!
ReplyDeleteHello!
ReplyDeleteStopping by for the first time and just love these beautiful framed prints! So pretty! Looking forward to perusing your blog :)
Kindly, Lorraine